

Add a SEPA QR to WooCommerce bank transfers
Choose the beneficiary account, put the amount and reference in a QR, then check the order confirmation and customer email.
A customer choosing bank transfer has to copy the beneficiary, IBAN, amount and reference. This tutorial shows how to put those details in a SEPA QR with JeyTech Order Transfer QR, on the order confirmation and in the customer email. These steps use the free plugin.
The QR prepares a transfer; it does not confirm payment. The customer checks the details and authorizes the transfer in their banking app. The merchant then checks that the funds arrived before updating the WooCommerce order.
What you need
- WordPress 6.6+, WooCommerce 9.6+, PHP 7.4+ with the zlib extension, and permission to manage WooCommerce.
- The free Order Transfer QR plugin on WordPress.org, installed and active.
- WooCommerce Direct bank transfer (BACS) enabled, a beneficiary account with a valid IBAN in a SEPA country, and test orders in EUR.
- A test store, an email address you control and, to try scanning, a banking app supporting EPC / GiroCode.
The plugin does not need GD or Imagick. It generates the PNG on your server, without an external QR service. The screenshots below use demonstration data. French screenshots elsewhere on this site use a separately installed development pack: the free plugin’s French translations are submitted to Translate WordPress but still await approval. Without an available language pack, the settings remain in English.
1. Configure the beneficiary in WooCommerce
In WooCommerce → Settings → Payments → Direct bank transfer, enable the payment method and enter the beneficiary name, IBAN and BIC for the account you want to use. Save the settings.
The plugin checks the SEPA country, IBAN length and checksum, beneficiary name and BIC format. A BIC is required for a beneficiary outside the European Economic Area. Technical validation does not prove that the account belongs to the right beneficiary: review the details with the merchant.
If WooCommerce holds several accounts, you will choose one explicitly in the next step. Do not use a demonstration screenshot’s bank details as a real account.
Expected result: the merchant’s account is saved in WooCommerce, and bank transfer is offered at the test checkout.
2. Enable the QR and choose a reference
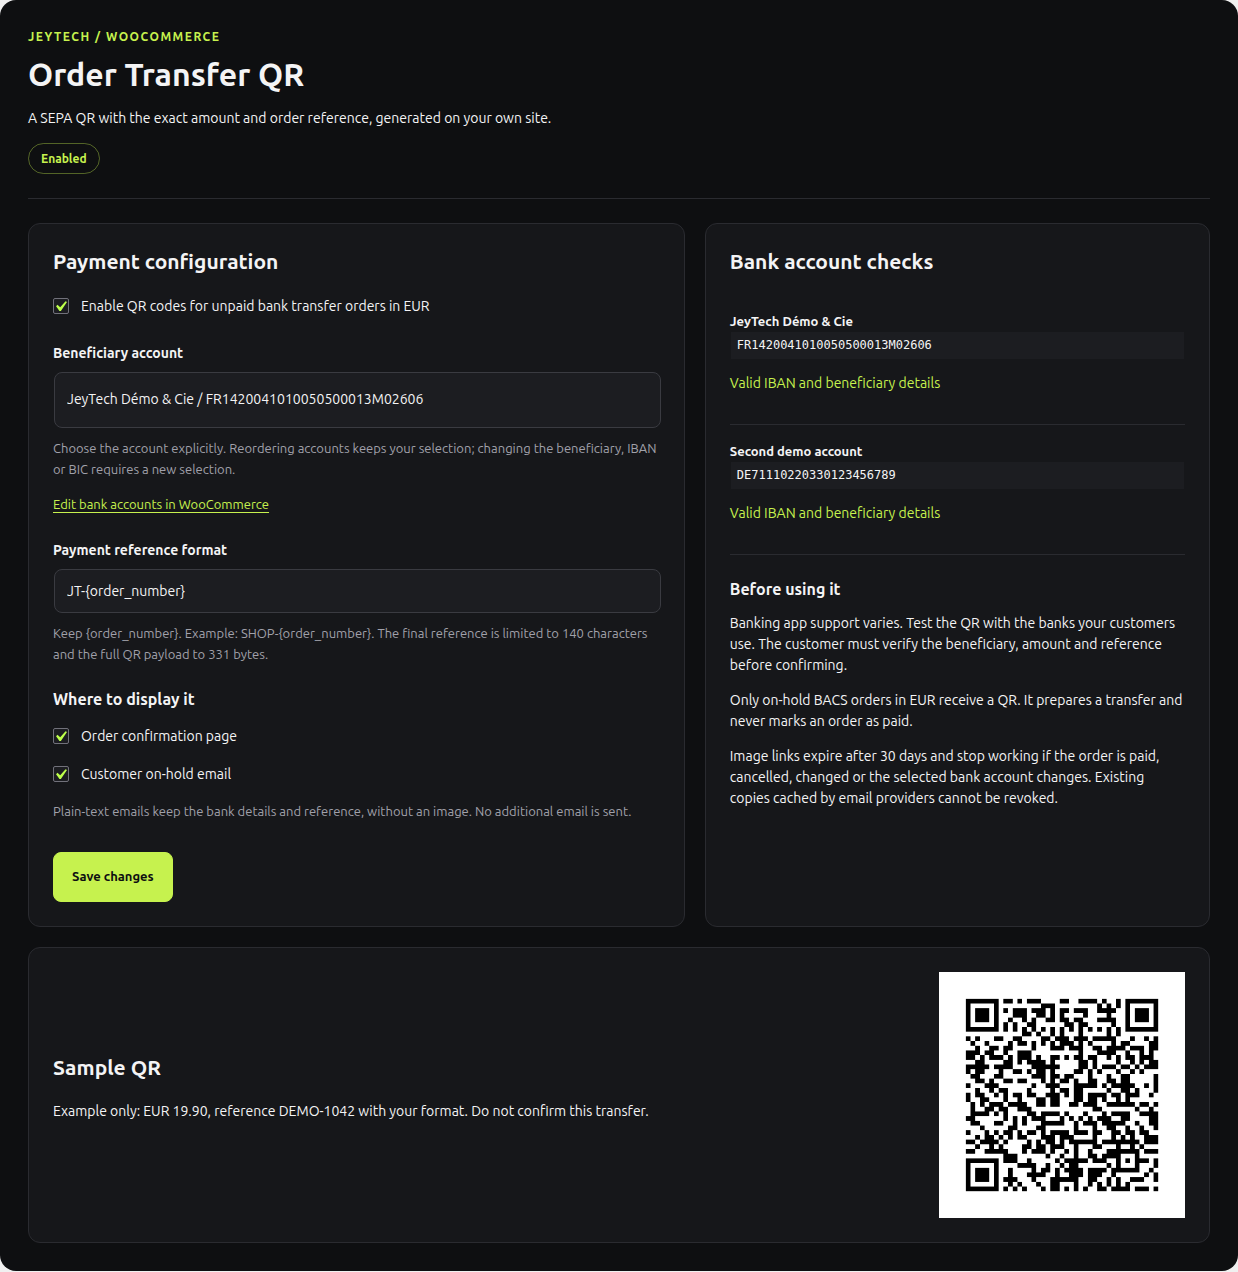
Open WooCommerce → Order Transfer QR.
- Select the beneficiary account saved in the previous step.
- Enable QR codes for unpaid bank transfer orders in EUR.
- Keep
{order_number}in the payment reference format. For example:SHOP-{order_number}. - Select Order confirmation page and Customer on-hold email, then save changes.
The order number is required. Other placeholders are not supported. The final reference is limited to 140 characters and the full QR payload to 331 bytes: keep the prefix short.
Reordering WooCommerce accounts keeps the selection. Changing the beneficiary name, IBAN or BIC requires selecting the account again.
Expected result: the settings show the chosen account, a valid reference and both display locations enabled. The sample QR in administration is not a real order: do not confirm that transfer.
3. Place a bank transfer order in euros
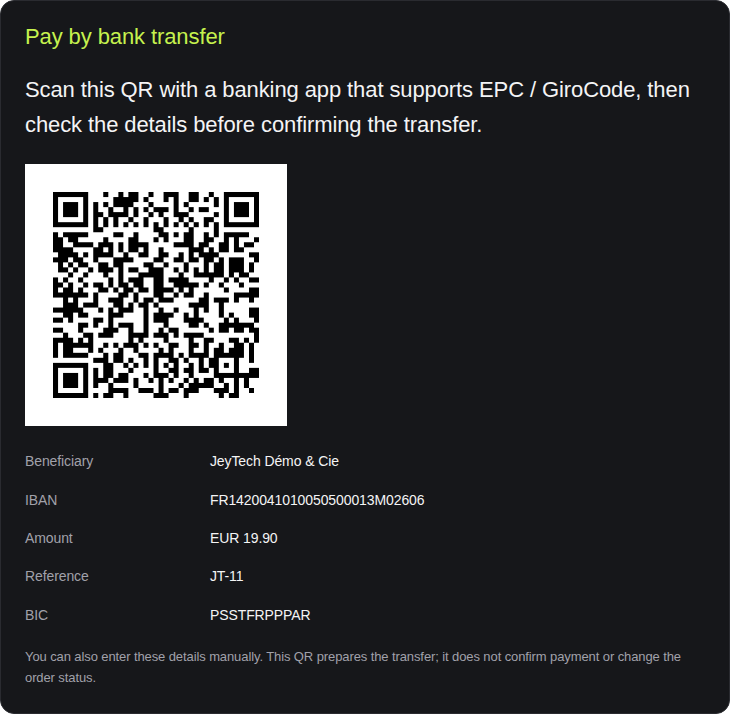
On the test store, place a new order with your email address and choose Direct bank transfer. Start with a simple amount, such as €19.90. Note the order number that WooCommerce actually assigns.
Leave the order On hold. The QR is not intended for card payments, other currencies or other order statuses.
On the confirmation page, compare the readable bank details with your selected account. Check that the amount matches the final order total, including any fees and taxes. With the format SHOP-{order_number}, the reference must contain that order’s actual number.
Expected result: the confirmation shows a QR together with readable payment details. The amount and reference match the order, on both classic and block order confirmations.
4. Check the email and banking app scan
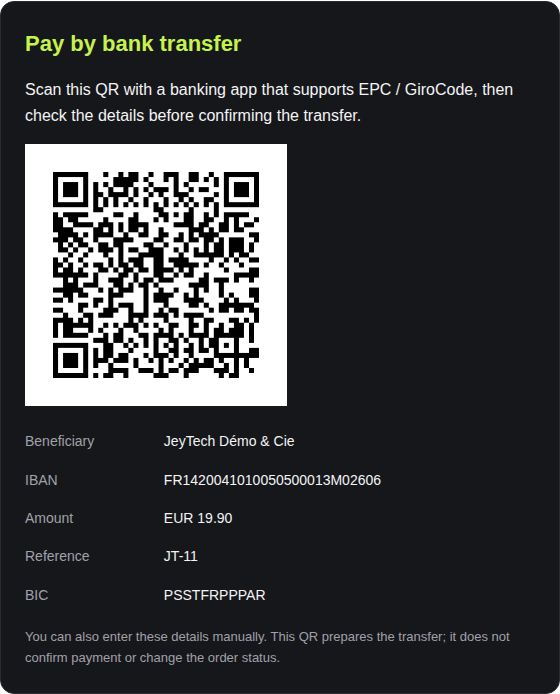
Open WooCommerce’s customer on-hold email at your test address. In an HTML email, check the QR and the same details shown on the confirmation. Plain-text emails retain the bank details and reference without an image. The plugin sends no extra email.
For the banking app check, use the QR from your own test order, with a verified beneficiary account. Open the scan function in an EPC / GiroCode-compatible banking app. If it can import a QR from an image, you can also check that route on a phone.
Before authorizing anything, compare:
| Field | Expected value |
|---|---|
| Beneficiary and IBAN | The merchant’s account selected in the plugin. |
| Amount and currency | The exact order total, in EUR. |
| Reference | The order number using your saved format. |
Stop before confirming the transfer. Checking the prefilled fields does not require sending money. If the app does not support this format, the customer can enter the readable details manually.
The plugin’s technical checks verified the encoded data; they do not replace this check with an actual banking app. No bank transfer was made for this tutorial’s screenshots.
Expected result: the email contains the right details and, with a compatible app, scanning fills in the right fields. The plugin does not mark the order as paid.
5. Check changes before going live
On the test store, change the reference or selected bank details, then check the still-eligible order again. For fresh instructions, reopen its confirmation instead of reusing an old image.
Image links are signed and expire after 30 days. They stop returning a QR when an order is paid or cancelled, its payment data changes, or the selected account changes. An image already saved or cached by an email provider cannot be removed remotely.
Before enabling the same settings on the real store, have the merchant approve the account, reference format and scan result. Agree who checks incoming transfers and updates the orders.
Expected result: the store configuration has been checked, and someone is responsible for payment follow-up. The plugin does not reconcile transfers or change stock or order status.
If the QR does not appear
| Situation | Check |
|---|---|
| No QR on the confirmation | Active plugin, QR option enabled and confirmation display selected. |
| Missing or invalid account | Name, IBAN, SEPA country, BIC where required, then explicit account selection. |
| Wrong payment method, currency or status | BACS, EUR and On hold. |
| Bank details recently changed | Select the account again and save. |
| Reference rejected | {order_number} present, no other placeholder, one line and a reasonable length. |
| No QR in the email | Email option enabled, HTML format and remote images allowed. Plain-text emails have no image. |
| Missing image in an old email | Expired link or changed data; reopen the confirmation if the order is still eligible. |
| Banking app rejects the QR | EPC / GiroCode support; keep readable details as the alternative. |
For help, use the plugin’s WordPress.org support forum or contact JeyTech. Include your versions and the context, without publishing customer data, order keys or signed image URLs.
When do you need Pro?
Free is enough to show the QR, amount and order reference on the confirmation and in the email. Order Transfer QR Pro adds structured ISO 11649 RF references saved per order and a local QR on WP Overnight PDF invoices, using a template with the supported insertion hook. It does not confirm payment either.
See Order Transfer QR Pro plans and the Pro installation guide if you need those features. For orders that remain unpaid, the tutorial on bank transfers holding stock covers a different task: setting deadlines and handling cancellations, without automatic bank payment detection.
